
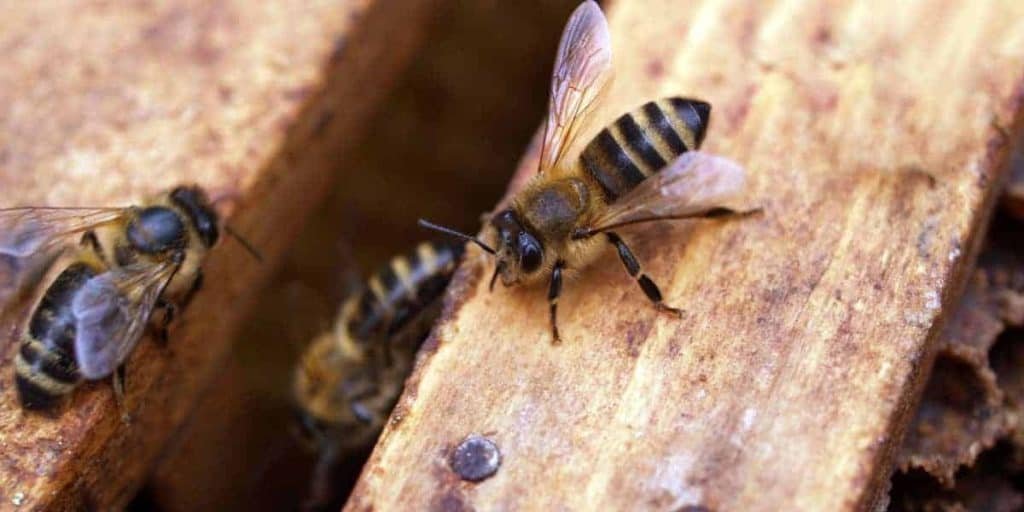
So you’ve got a hive, but you still need the most important ingredient. Yes, some bees! There are 4 main ways to get bees: a nuc, a split, a swarm or a package. We will quickly introduce each way before diving in more details:
- Nuc: A nuc or nucleus is a mini, already-functioning hive. Comes complete with frames, brood, bees, a queen, pollen and honey stores. Just transfer the frames into your new hive box and add some more frames.
- Split: A split is when you take some frames with bees from the hive of another keeper, which must be done at the right time of year. Then add a queen which you can order in the mail from a queen breeder. It’s also possible they will raise their own queen, given the right conditions.
- Swarm: When bees reach high enough numbers they swarm to form new hives, usually in the springtime. The queen will leave the hive with half the bees and temporarily land nearby. Put your bee box underneath the swarm and shake the branch to get the bees into your new hive.
- Package: You can order a package containing a mated queen and about 10,000 bees in a ventilator box. Bee breeders will send the package by mail, and you transfer them into your hive.
- BONUS METHOD: A bait hive is a less commonly used method, where an empty box with a scent is used to lure a swarm of bees in.
Method 1: Buying a nucleus (nuc)
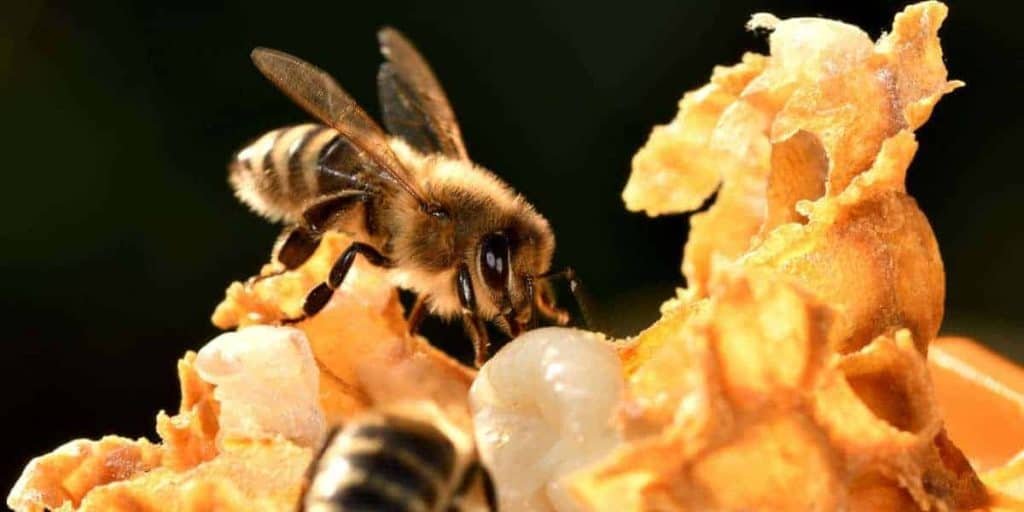
A nucleus or “nuc” is a small beehive that you typically purchase from a bee breeder. It usually consists of five frames, with a queen bee, brood, honeycomb, pollen, and enough bees to start your hive.
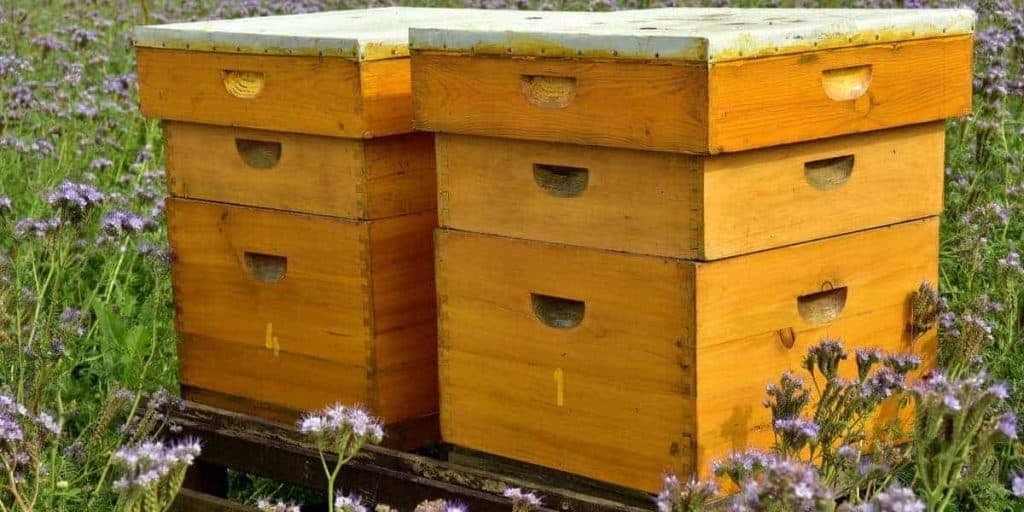
- Prepare your materials, have your brood box, inner cover, and roof ready. You need enough frames to fill the brood box – usually 8 or 10 depending on the width.
- Put on your beesuit before you begin, and have your smoker on hand. Unless it’s very hot, keep the vents closed when you install the nuc. This will allow the bees to find the entrance rather than trying to use the vents as an entrance when they’re following the queen’s pheromone.
- In some cases, keep the corflute slider in the top position to prevent them from trying to enter through the screened bottom board.
- When you receive the nuc, put it where you intend to situate the beehive. This will allow the bees to begin to orientate themselves to the location. Provide some shade if you are going to leave the nuc there for some time before installing the nuc.
INSTRUCTIONS:
- When you are ready to install the nuc, gently move it aside, being careful not to squash any bees. Then move the brood box into position.
- If using foundationless frames, make sure the brood box is level.
- Carefully lift a frame from the nuc using the hive tool. Use some smoke to clear the area before lifting, and cut away any burr comb that is holding the frames together. Gently lift the frame out and slowly transfer it to the brood box.
- Transfer each frame into the brood box and keep them in the same order as they were in the nuc. Put them in the center of the brood box, and put the empty frames at the edges.
- When you have transferred the frames into the brood box, put the new frames at each end of the brood box. Press the frames together so that there is no space between the edges of the frames. If there is space between the frames and the edges of the brood box, centre the set of frames to make sure the space is even at both sides.
- Hold the nuc above the brood box, and give it a quick, hard shake to get most of the remaining bees into the brood box. Leave the nuc near the hive entrance, so that any remaining bees can find their way to the hive.
- Brush away any bees from the top of the brood box, and gently place the inner cover and roof onto the brood box.
Your nuc is now installed! The bees will build up their numbers and honey stores, after which you can add a honey super.
If there are not many plants in bloom in your area, you may need to feed your bees, this will depend on the season and your location. If you’re unsure, talk to your supplier or other local beekeepers to get their advice.
Method 2: Getting a split
One way of getting a new hive is to split an existing hive into two. Here’s how to do it:
- To split a hive, you will remove some frames from an existing hive and put them into a new one, ensuring that both hives contain an egg-laying queen.
- The best time to split a hive is typically in spring when the bees are building up their numbers and there is plenty of forage available.
- When you are splitting a hive, it’s best to move the original hive slightly, and place the new hive directly beside the original one. As the bees are geo-located to the hive, this should ensure that you will get an even number of bees returning to each hive.
- In a cold climate, you could place the new hive directly on top of the original, to warm the new hive.
- You can either buy a queen from a breeder or else let the bees raise their own queen. An advantage of letting the bees raise their own queen is that you don’t need to find the queen when splitting the hive. As long as both hives have eggs or larvae under three days old, the bees will be able to raise a new queen.
INSTRUCTIONS FOR LETTING THE BEES RAISE THEIR OWN QUEEN:
- Move the original about half a hive width, and place the baseboard of the new hive directly beside it. Put the brood-box onto the baseboard and remove half of the frames.
- TIP: Use your smoker regularly during this process, it will help to keep the bees calm, and also to clear them away from the area you need to work on.
- Remove the lid, and the super if you are using one.
- Gently remove a frame from the edge of the hive, and check the brood cells for bee eggs or very young larvae (less than three days old).
- When transferring the frames into the new hive, you want to follow the natural pattern that bees like to have in the hive: honey at the edges, followed by pollen and drone cells with brood in the center.
- TIP: Naturally drawn comb can be weak, so be careful not to break it when inspecting the frames.
- Put some of the frames from the original hive into the new hive, ensuring that both have some frames with bees and young larvae in them. It’s a good idea to put frames with a lot of capped brood into the new hive. This will help get the new hive up and running.
- TIP: If the bees have joined frames together with burr comb, it’s a good idea to separate them using the hive tool before removing the frames.
- While you work, check the frames and hive for any signs of disease or pests.
- When moving a frame to the new hive, don’t shake it. You want the bees on the frame to enter the new hive too.
- Split the frames more or less evenly between the two hives, ensuring both have some bee eggs or young larvae in them. Frames with a lot of honey can be left in the original hive.
- Keep the brood frames together in the center of the new hive, then fill in the brood box of each hive with empty frames.
- Put the lids back onto your hives, and you’re done.
- You will need to check the hives over the next few weeks to ensure the bees do raise a new queen.
If they don’t, you will need to either merge the hives again or order a new queen. If you order a new queen, the process is slightly different. Two advantages of ordering a new queen are: you can get a queen selected for specific traits, and you won’t lose the few weeks of egg-laying time that it takes to raise a new queen.
INSTRUCTIONS FOR ADDING A NEW QUEEN:
- Split the hive in the same way as described above, but make sure you know which hive the queen is in.
- Wait at least eight hours after the split before you add the new queen to the queenless hive.
- The queen cage usually comes with one end blocked with candy, that the bees chew through to free the queen. Make sure the cap of the queen cage is pointed upwards and at an angle. This will ensure that if the cap melts, the queen can avoid the melting candy.
- Place the queen cage at an angle between two central brood frames, then put the lid back on the brood-box. She should emerge from the cage within a day, by which time the bees will be accustomed to her pheromones.
As above, it’s best to split hives in spring when there’s lots of forage available. If there are not many plants in bloom in your area, you may need to feed your bees, this will depend on the season and your location. If you’re unsure, talk to your supplier or other local beekeepers to get their advice.
Method 3: Catching a swarm
Catching a swarm is the most exciting way to get a new hive started. Here’s how:
- Swarming is a colony’s natural way of reproducing itself. Bees will swarm when their hive is too crowded with bees and honey, usually in the springtime. The queen will leave the hive taking about half the bees and most of the honey with her.
- After leaving the hive, the swarm will usually cluster on a nearby branch. During this time, the bees are inspecting the surrounding area for a new place to live. This is your chance to give them a new home.
- Put on your bee suit, gloves and veil before you approach the swarm. Although bees are usually gentle when swarming, it’s best to be safe.
- Make sure you have a clear path to the swarm. If needed, you can trim some of the branches close to where the swarm is clustered, but be careful not to shake the branch they are on at this point.
INSTRUCTIONS:
- Place your brood box under the branch where the swarm is, and make sure it’s level. In some cases, you can use the hive stand’s adjustable legs to ensure it is level. This is important to ensure the bees build their comb correctly.
- For some boxes, keep the vents closed, this will help the bees locate and adjust to the new hive.
- Place the brood box directly underneath the swarm, and remove some of the brood frames in the center to make space for the bees.
- Grab the branch that the swarm is on and give it a strong sharp downward shake. The bees should fall off the branch and into the box.
- Cut off the branch that the bees were on, and shake it again until most of the bees are in the box.
- If the queen is in the box, the rest of the bees will follow.
- Gently put the brood frames back in the box, being careful not to crush any bees.
IMPORTANT: Press the middle frames tightly together to make sure the bees build their comb properly. If there is space between frames, make sure it’s at the edges of the box rather than the center.
After all, don’t forget to brush away and bees from the top of the box, and then put on the inner cover and the lid.
The bees should now settle into their new home, and you’ve got a new hive! If there are not many plants in bloom in your area, you may need to feed your bees, this will depend on the season and your location.
If you’re unsure, talk to your supplier or other local beekeepers to get their advice.
Method 4: Buying a package
Honey bee starter kit is easy to get these days. So you’ve received a package of starter bee hives – here’s how to get set up!
A package is like a swarm – a group of bees looking for a home. It consists of a box of bees with a queen inside a cage and a can containing syrup for the bees to feed on.
Get suited up before you start, make sure you’re protected from potential stings. (Read more on how to protect yourself)
The bees need to go into an enclosed space – if you’ve got a screened bottom board they may get confused when seeking the queen’s pheromone and hang on the screen, the outside of the hive, or even fly away! So make sure the bottom is closed off.
Unless it’s very hot, keep the vents closed. This will allow the bees to find the entrance rather than trying to use the vents as an entrance. In some cases, keep the corflute slider in the top position to prevent them from trying to enter through the screened bottom board.
A NOTE ABOUT THE QUEEN:
- A package will contain a queen inside a cage, and the type of cage may vary depending on your area and the company you get your package from. Make sure your queen is alive and well before you start.
- The queen gives off pheromones that enable the bees to get organised. The bees will cluster around the queen to take care of her – so where the queen is, the bees will stay.
- Where you situate your queen will depend on your location and the weather:
- If there is any risk of freezing, don’t put the queen at the bottom of the hive. If it gets too cold the bees will cluster at the top of the hive and she may freeze.
- If you’re in a warm climate with no risk of freezing, you can place the queen cage in the bottom of the hive. The bees will take a couple of days to free the queen, by then they’ll have started building comb and be settled into the hive.
- If you hang the queen cage between the frames at the top of the hive, the bees may start building comb from the cage, which is not ideal in a new hive. If you do this, make sure to remove the queen cage after a few days so that the bees will build their comb correctly on the frames.
- You can also release the queen and leave her free in the hive. This usually works well when you’ve just got one hive, but if you’ve got multiple hives the bees might be more likely to leave and find another queen in this case.
INSTRUCTIONS FOR INSTALLING YOUR PACKAGE:
- Remove the middle frames from your hive to make some space to add your queen and bees.
- Remove the feeding can from the package, you may need to use pliers or a hive tool for this.
- Remove the queen cage, then replace the feeding can so that most of the bees stay in the package.
- The queen cage will be sealed with some edible material, so the bees can chew through this to release her. Remove the cap if there is one. You can poke a hole through the food, which will speed up the queen’s release, but this is not strictly necessary.
- Now it’s time to add your bees. The best way to do this is to shake them out of the package and into the hive. Don’t leave the package on top of the hive and wait for them to go in, they may start building comb in the package instead of on the frames.
- TIP: Don’t spray the bees with sugar – this will make them sticky and often drowns them.
- If you want to reuse the package, you can shake the bees out of the hole and into the hive. Or else you can cut away the screen and dump the bees out. This is the one time in beekeeping that you don’t need to be too gentle – when you want to knock bees off something. A quick, hard shake will be much more effective and ultimately less stressful for the bees than trying to gently tap them off.
- Once the queen and most of the bees are in the hive, you can replace the middle frames. The others will find their way back to the hive in time. Be gentle when putting the frames in, try not to squash any bees.
- IMPORTANT: Pack the frames tightly together in the middle of the box. This should prevent the bees from building comb in the spaces between frames.
- When the frames are in, it’s time to put the lid back on. To avoid crushing any bees, flick them away from the top using a bee brush or a big feather. Cover the hole on the inner lid. This will prevent the bees from building comb down from the roof.
If there are not many plants in bloom in your area, you may need to feed your bees, this will depend on the season and your location. If you’re unsure, talk to your bee supply companies or other local beekeepers to get their advice.
Bonus method (Method 5): Setting up a bait hive
One way to get bees is by attracting a swarm into an empty bait hive. This is most likely to work in the springtime, and in an area where there are already several beehives. You can use scents to help lure in a swarm that is looking for a new home.

- Bees tend to swarm during times when there is a heavy nectar flow, usually during spring and summer. Consult with local beekeepers to find out when bees in your area tend to swarm, and set your bait hive before this.
- Swarms tend to prefer to nest in cavities of approximately 40 liters that have small entrances. You can use a basket or barrel, or buy a swarm trap, but the easiest way is to catch them in the hive you intend to keep them in.
- Choose an area that has water, plenty of flowers and not much human activity. You can increase your chances of catching a swarm by setting multiple bait hives.
- Add a scented lure to the hive to help attract bees. You can create your own, simply by adding a few dabs of lemongrass oil to the bait hive. Other methods involve using a dead queen to make a lure, or buying ready-made lures that are scented with bee pheromones.
- Set your bait hive raised from the ground as high as you can while still being able to access it without much difficulty. Ensure that it has some shade, and the entrance is pointing toward the sun (south if you are in the Northern Hemisphere and north if you’re in the Southern Hemisphere).
- Leave your bait hive undisturbed for 2-3 weeks. When you come to check on it, observe it from a distance. Scout bees will inspect a potential new home for several days before deciding to move in, and you don’t want to interrupt them during this process.
- If you see that bees have taken up residence in your bait hive, leave them there for at least a week before inspecting or moving the hive. This will give them time to have eggs hatching, so they won’t leave the hive due to disturbance.
- Before approaching the hive, make sure you are wearing your full bee suit.
- Inspect the hive and look for eggs to ensure that the colony has a laying queen.
- If you want to move the hive, check out our “How to move a swarm” lesson HERE.
Voilà! After about 3,333 words, we have learned about 5 ways for you to get your very bees. Your beekeeping “career” has been opened up wider than ever! Remember to always look for bee suppliers near you for advice and equipment.
One simple tip is to search for “beekeeping supplies near me” or “beekeepers near me” or “local beekeepers near me” on Google :).
Originally posted 2020-04-11 18:16:25.


