How to Start a Worm Farm? Begin your worm farm by selecting a suitable container, filling it with bedding material such as shredded paper or compost, introducing red worms, maintaining proper moisture and temperature levels, and regularly feeding the worms organic matter to produce nutrient-rich vermicompost for gardening or agricultural purposes.
Digging into Worm Farming: A Step-by-Step Guide to Starting Your Own Composting System
Worm farming, also known as vermicomposting, is the process of using worms to break down organic waste materials into nutrient-rich compost. This method of composting has gained popularity in recent years due to its numerous benefits for both the environment and gardeners.
Worm farming not only reduces the amount of waste that goes to landfills but also produces a valuable resource that can be used to improve soil health and plant growth.
Understanding the Basics of Worm Farming
Worm farming involves creating a controlled environment where worms can thrive and efficiently break down organic waste. The worms used in worm farming are typically red wigglers (Eisenia fetida) or European nightcrawlers (Eisenia hortensis). These worms are well-suited for composting as they have a voracious appetite and can consume large amounts of organic matter.
The benefits of worm farming are numerous. Firstly, it helps reduce the amount of waste that goes to landfills, which in turn reduces greenhouse gas emissions and helps combat climate change. Secondly, worm castings, also known as vermicompost, are a nutrient-rich fertilizer that can improve soil structure, increase water retention, and promote healthy plant growth. Lastly, worm farming is a sustainable and cost-effective way to produce compost for your garden or indoor plants.

Choosing the Right Worms for Your Composting System
When it comes to choosing worms for your composting system, there are a few factors to consider. Red wigglers and European nightcrawlers are the most commonly used worms in worm farming due to their ability to efficiently break down organic matter.
Red wigglers are smaller in size and reproduce quickly, making them ideal for small-scale worm farms. They thrive in temperatures between 55-77°F (13-25°C) and can consume half their body weight in organic matter each day.
European nightcrawlers, on the other hand, are larger and more active, making them suitable for larger-scale worm farms. They prefer slightly cooler temperatures between 50-70°F (10-21°C) and can consume up to their body weight in organic matter each day.
When choosing worms, it’s important to consider the size of your composting system, the temperature conditions, and the amount of organic waste you generate.
Selecting the Right Container for Your Worm Farm
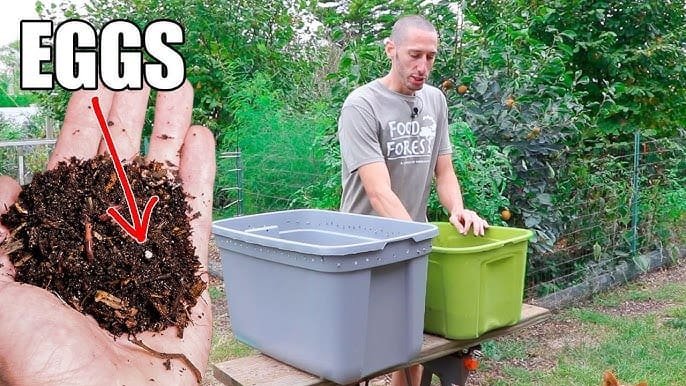
Choosing the right container for your worm farm is crucial for the success of your composting system. There are several options available, including plastic bins, wooden boxes, and specialized worm farm kits.
Plastic bins are a popular choice for beginners as they are affordable, readily available, and easy to maintain. They can be easily drilled with ventilation holes and have a lid to keep pests out. Wooden boxes provide a more aesthetically pleasing option but require more maintenance to prevent rotting.
If you’re feeling crafty, you can also create your own DIY worm farm container using materials such as old wooden pallets or repurposed plastic containers. Just make sure the container is large enough to accommodate your worms and has adequate drainage.
When choosing a container, consider factors such as size, durability, ventilation, and ease of access for feeding and harvesting.
Preparing the Bedding Material for Your Worms
Bedding material is essential for creating a comfortable environment for your worms. It provides moisture retention, insulation, and a source of carbon for the worms to consume alongside their food scraps.
Common bedding materials include shredded newspaper, cardboard, coconut coir, and aged compost. Avoid using glossy or colored paper as it may contain harmful chemicals. The bedding material should be moist but not soggy, with a consistency similar to a wrung-out sponge.
To prepare the bedding material, shred newspaper or cardboard into small pieces and soak them in water for a few hours. Squeeze out the excess water and fluff up the bedding before adding it to your worm farm.
Feeding Your Worms: What to Feed and What to Avoid
Worms are not picky eaters and can consume a wide variety of organic waste materials. Suitable food scraps for worms include fruit and vegetable peels, coffee grounds, tea bags, eggshells, and plant trimmings. It’s important to chop or blend the food scraps into small pieces to make it easier for the worms to consume.
However, there are certain foods that should be avoided as they can harm the worms or attract pests. Avoid feeding your worms meat, dairy products, oily foods, citrus fruits, onions, garlic, and spicy foods. These foods can create an imbalance in the worm farm and cause odors or attract flies.
To feed your worms, simply bury the food scraps in the bedding material and cover them with a layer of bedding. Start with small amounts of food and gradually increase the quantity as the worms adjust to their new environment.
Managing Moisture Levels in Your Worm Farm
Moisture is crucial for the health and well-being of your worms. It helps them breathe, aids in digestion, and provides a suitable environment for beneficial microorganisms.
The bedding material should be kept moist but not waterlogged. To maintain proper moisture levels, periodically check the moisture content by squeezing a handful of bedding material. It should feel damp but not release any excess water.
If the bedding material is too dry, mist it with water using a spray bottle. If it’s too wet, add dry bedding material or remove excess moisture by squeezing it out.
Maintaining the Temperature in Your Worm Farm
Worms have specific temperature requirements for optimal growth and reproduction. The ideal temperature range for most composting worms is between 55-77°F (13-25°C).
To regulate the temperature in your worm farm, place it in a location that is protected from extreme heat or cold. Avoid placing it in direct sunlight or near heating or cooling sources.
During hot weather, you can cool down the worm farm by placing a damp cloth or shade cloth over the container. In colder temperatures, insulate the worm farm with blankets or straw to retain heat.
Harvesting Vermicompost: When and How to Do It
Vermicompost, also known as worm castings, is the end product of the worm farming process. It is a nutrient-rich fertilizer that can be used to improve soil health and plant growth.
Signs that your vermicompost is ready for harvesting include a dark, crumbly texture and an earthy smell. The worms will have consumed most of the organic matter and transformed it into nutrient-rich castings.
To harvest vermicompost, stop feeding the worms for a week to allow them to process any remaining food scraps. Then, gently separate the vermicompost from the worms using one of several methods:
1. Migration Method: Create a pile of fresh bedding material on one side of the worm farm and place food scraps on top. The worms will migrate towards the new food source, allowing you to easily collect the vermicompost from the other side.
2. Light Method: Shine a bright light on one side of the worm farm. The worms will move away from the light, allowing you to scoop out the vermicompost from the other side.
3. Hand Sorting Method: Spread out the contents of your worm farm on a tarp or large tray and manually separate the worms from the vermicompost. This method can be time-consuming but allows for a more thorough separation.
Using Vermicompost in Your Garden or Indoor Plants

Vermicompost is a valuable resource that can greatly benefit your garden or indoor plants. It improves soil structure, increases water retention, enhances nutrient availability, and promotes healthy plant growth.
To use vermicompost in your garden, simply spread a thin layer of vermicompost around the base of your plants or mix it into the soil before planting. For indoor plants, mix vermicompost with potting soil or use it as a top dressing.
It’s important to note that vermicompost is a concentrated fertilizer, so it’s best to start with small amounts and gradually increase the quantity. Monitor your plants’ response to the vermicompost and adjust the application rate accordingly.
Troubleshooting Common Problems in Your Worm Farm
Like any gardening endeavor, worm farming can sometimes encounter problems. Here are some common issues you may encounter and how to address them:
1. Foul Odors: Foul odors in your worm farm are usually a sign of overfeeding or excessive moisture. To address this issue, stop feeding the worms for a week and adjust the moisture levels by adding dry bedding material or removing excess moisture.
2. Fruit Flies or Gnats: Fruit flies or gnats can be attracted to decaying food scraps in your worm farm. To eliminate them, bury food scraps deeper in the bedding material and cover them with a layer of bedding. You can also place a layer of newspaper on top of the bedding to discourage flies from laying eggs.
3. Worm Escapees: If you find worms escaping from your worm farm, it may be a sign of unsuitable conditions such as high temperatures or acidic conditions. Check the temperature and pH levels in your worm farm and make adjustments as necessary.
Tips for Successful Worm Farming: Dos and Don’ts for Beginners
To ensure successful worm farming, here are some dos and don’ts to keep in mind:
Dos:
– Do provide adequate ventilation for your worm farm to prevent odors and promote airflow.
– Do monitor the moisture levels regularly and adjust as necessary.
– Do feed your worms a balanced diet of organic waste materials.
– Do harvest vermicompost when it’s ready to prevent overcrowding and maintain a healthy worm population.
Don’ts:
– Don’t overfeed your worms, as it can lead to foul odors and attract pests.
– Don’t use chemicals or pesticides in your worm farm, as they can harm the worms and beneficial microorganisms.
– Don’t expose your worm farm to extreme temperatures or direct sunlight.
– Don’t add non-biodegradable materials such as plastics or metals to your worm farm.
Worm farming is a sustainable and rewarding way to reduce waste, produce nutrient-rich compost, and improve soil health. By understanding the basics of worm farming, choosing the right worms and container, preparing bedding material, feeding and maintaining moisture levels, managing temperature, harvesting vermicompost, troubleshooting common problems, and following dos and don’ts for success, you can embark on a successful worm farming journey.
So why not give worm farming a try? Start small with a simple plastic bin or DIY container, gather some red wigglers or European nightcrawlers, and begin composting your organic waste. Not only will you be reducing your environmental impact, but you’ll also be creating a valuable resource for your garden or indoor plants. Happy worm farming!
Originally posted 2024-03-16 16:56:10.